How to Mount an Awning to a Roof Rack: A Guide
If you’re looking to improve your vehicle’s contribution to your outdoor adventures, then mounting an awning to your roof rack can be just what you need, providing shade and shelter on your travels. Whether you’re planning for a camping trip, want a little shade at the beach, or looking to make rest spots a little more comfortable during your road trip, a well-mounted awning can bring real comfort and convenience. Here, we’re going to look at how you mount your awning to your vehicle’s roof rack, and what you need to consider to make it a good match.
Selecting The Right Awning For Your Vehicle
Not every awning is going to work with every vehicle. You need to make sure that you’re choosing one that fits not just your vehicle but your needs, as well. Here, we’re going to look at factors you should consider when choosing the awning you want to fit.
Vehicle Compatability
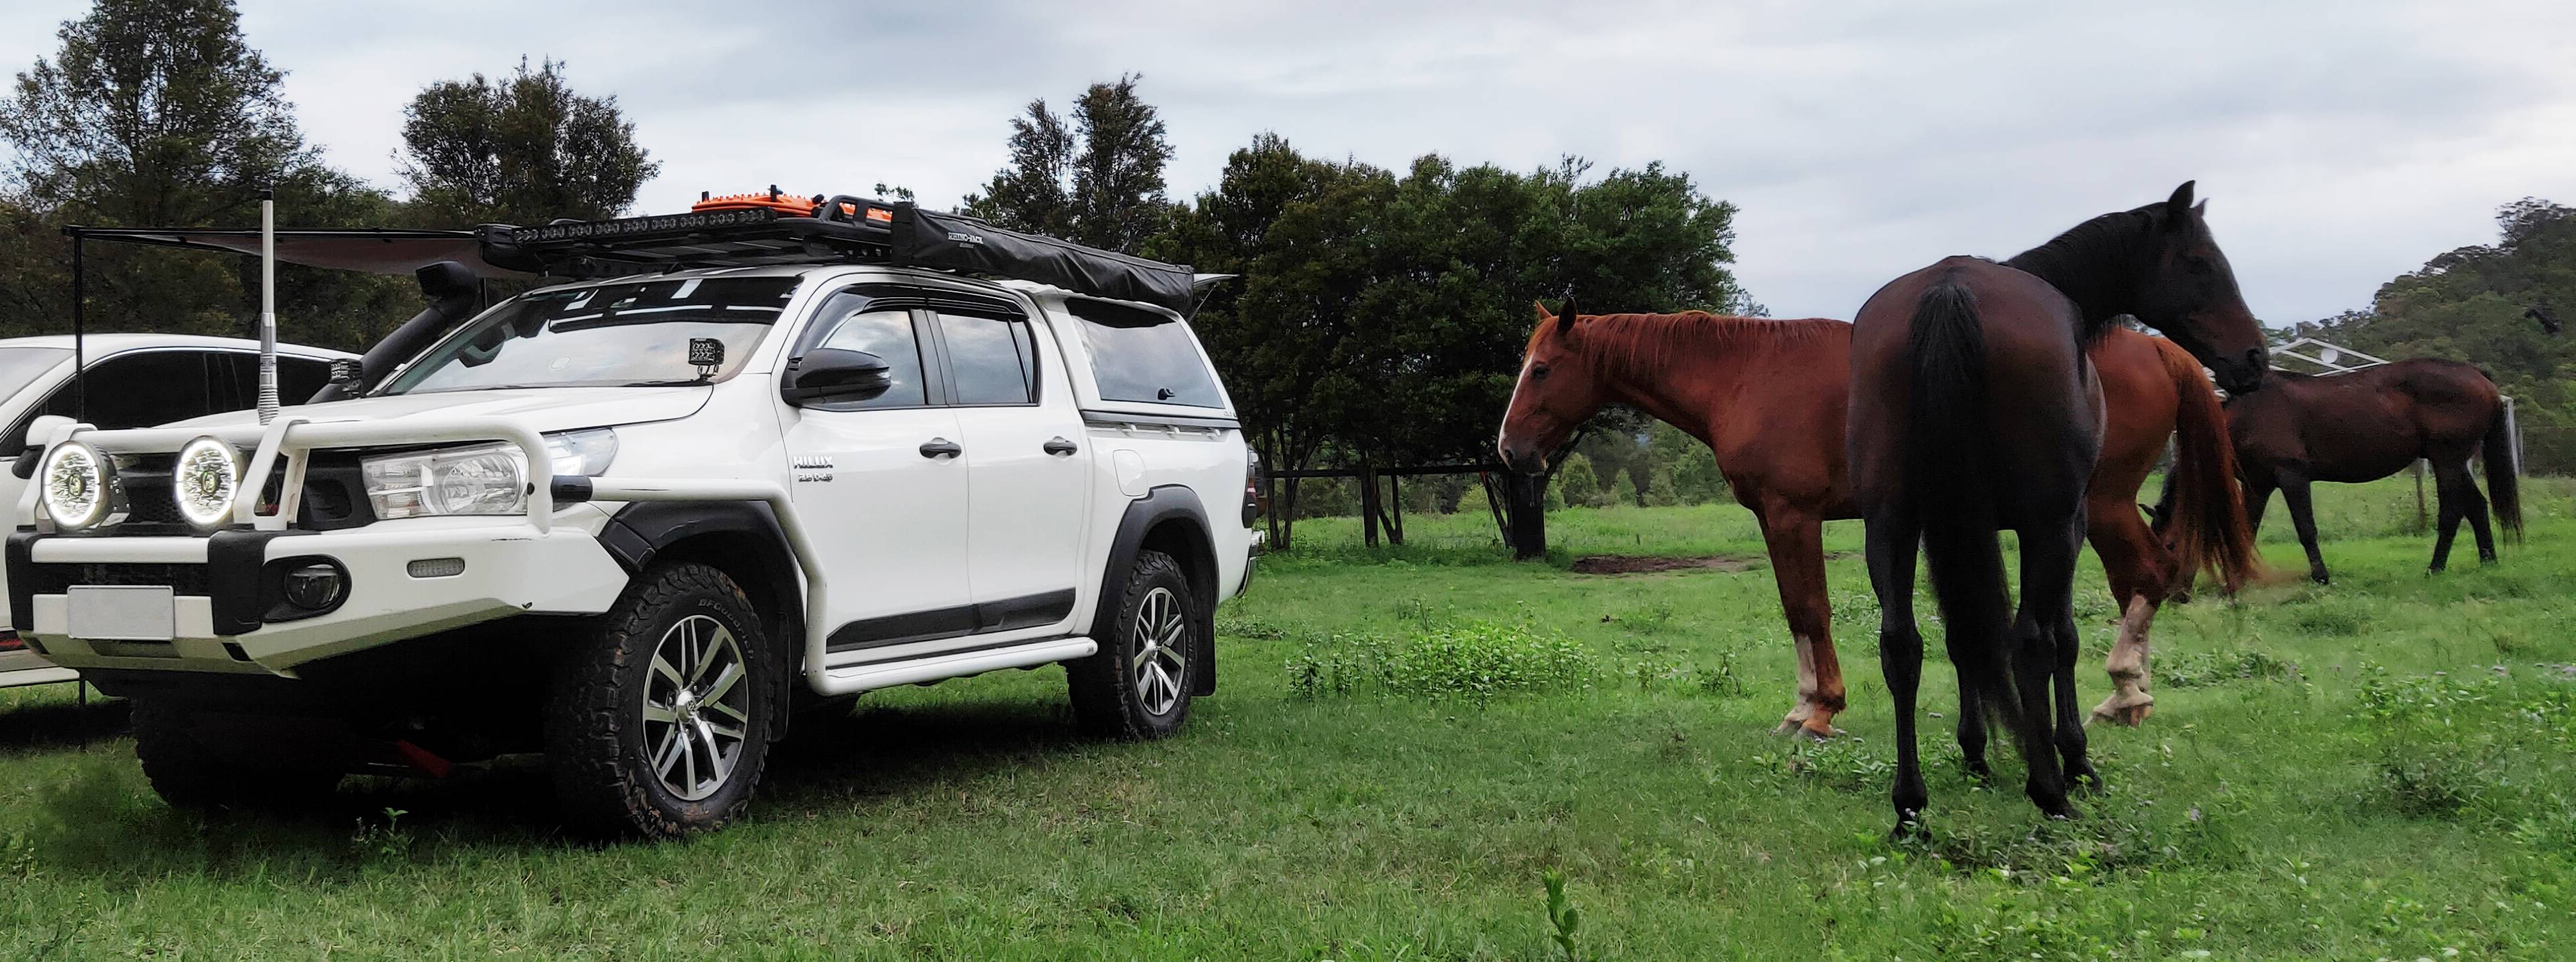
As mentioned, your vehicle itself is going to play a role dictating which awnings are best suited to it. Some are designed for specific makes and models, while others are designed to work more universally. Know what kind of roof rack system you have, and the overall dimensions of your vehicle so you can narrow your options down to those most likely to work. Bossco Awnings are of the more universal type, they're compatible with Bossco Roof Racks and should mount to any vehicle that is capable of holding an awning.
Size and Coverage
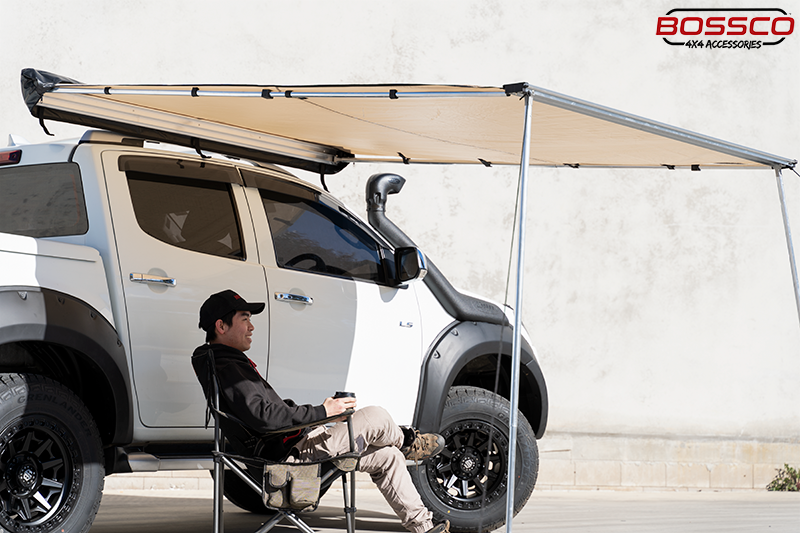
Depending on how you intend to use your awning, you need to make sure you get the coverage that you need. They can come in all kinds of sizes, but most range between 2.0 meters to 2.5 meters in length. The shape can determine what kind of coverage it offers, as well. For instance, a 270-degree awning can wrap around both the side and rear of the vehicle if you want more shade or shelter.
Mounting Compatability
Make sure that you’re able to mount the awning of your choice on the roof rack or platform that you already have. There are some that require specific mounting brackets or systems to work with, so know your vehicle’s roof rack specifications before you spend your money on a choice that won’t work.
Material and Durability
Given that they are designed to withstand harsh outdoor conditions for long periods at a time, most awnings are built for those conditions. However, if you want them to last, choose one made specifically from high-quality, UV-resistant and waterproof fabric with an aluminum frame that is both light and strong. This way, you can make sure that they’re able to live a long life, no matter what kind of elements you take them out to.
Aside from the awnings themselves, you need a good base to fit them on. You can browse the selection of roof racks and platforms at Bossco Auto’s collection to make sure that you’re able to get one that allows you to add the awning of your choice.
Tools And Materials You Will Need
One of the most frustrating mistakes you can make is getting the awning you need, compatible with your roof rack and ready to be installed, but once you start, you realize you don’t have all of the tools you will need. Here’s what you should prepare ahead of time to make that installation go smoothly:
-
The Awning Kit: This should include the awning itself, as well as any mounting brackets, bolts, nuts, and other hardware required to fix it in place.
-
Roof Rack: Be sure to check ahead of time that your roof rack is compatible with the awning of your choice, and is able to handle the additional weight.
-
Measuring Tape: Needed for accurately positioning the awning.
-
Wrenches or Socket Set: To tighten bolts and nuts.
-
Screwdrivers: Ensure you have the screwdrivers that match the size and format of screws in your mounting kit.
-
Drill With Appropriate Bits: You might need this to drill holes into the roof rack for mounting, depending on its type..
-
Ladder Or Step Stool: To reach and work on the roof rack safely.
-
Safety Gear: You should be equipped with things like gloves and safety glasses to keep yourself safe during the installation.
If you have the above all at the ready, then you should be able to install your awning. However, it’s worth checking the manufacturer’s instructions to see if they recommend any other tools or materials for the process, as well.
Step-by-Step Awning Mounting Process
If you want to mount your awning successfully, then follow these steps in order:
Step 1: Read the Manufacturer’s Instructions
Although we’re going to provide basic steps for installing any awning, the installation manual provided with yours will often have more detailed and specific instructions, and may include specific requirements or recommendations. Make sure that you read it thoroughly. If you aren't sure then it's always best to consult a professional.
Step 2: Position The Vehicle Of A Level Surface
You want to make sure that the vehicle doesn’t move during the installation, so park it on a flat, stable surface. Make sure that the parking brake is engaged before you start any work on it.
Step 3: Assemble The Mounting Brackets
The mounting brackets are what fix the awning to your roof rack. The need to be attached to the awning itself, which is usually done with a series of provided bolts and nuts. Make sure they’re all securely tightened.
Step 4: Mark the Mounting Points On The Roof Rack
When your awning is assembled, lift it up on top of the roof rack to figure out the best mounting points for it. You can then mark these points with a pencil or a marker.
Step 5: Drill Holes (If Necessary)
Some awning mounting brackets and roof racks are designed to allow you to connect them easily, but for others, you may have to drill holes to make your own mounting points. Use the appropriate drill bits and be careful to not damage the rack.
Step 6: Attach The Awning To The Roof Rack
Take care to align your mounting brackets with the drilled holes or the provided mounting points on the roof rack. Insert the provided bolts through the brackets and secure them with nuts, making sure that they are firmly in place.
Step 7: Check It’s Aligned And Stable
Be sure to check that the awning is aligned correctly and sits securely on the roof rack once it's mounted. If it feels unstable at all, you may need to adjust it.
Ensuring A Secure Fit
You want to make sure that your awning and mounting brackets are securely attached to ensure a secure and durable awning setup.
-
Regularly inspect the tightness of your mount’s bolts, and the condition of the mounting bracket, especially after prolonged trips or any inclement weather.
-
If the weather is windy or otherwise bad, use additional ropes and pegs to anchor your awning so that there isn’t undue stress on any of the connecting bolts of the bracket.
-
Distribute the weight of the awning evenly, making sure it's positioned in a way that lessens stress across the board.
-
Use thread locking compound to prevent bolts from being loosened by vibrations.
Common Mistakes And How To Avoid Them
Ignoring Weight Limits
Your roof rack has its own weight capacity. Ignoring it can lead to structural damage to the rack itself. Make sure that you’re aware of it, as well as the combined weight of the awning and its mounting bracket.
Improper Bracket Placement
Failing to position the mounting bracket properly can lead to instability. The manufacturer should have guidelines on the best position to place the bracket.
Insufficient Tightening
Loose bolts can result in a wobbly awning. Use appropriate tools to tighten all hardware securely.
Skipping Routine Maintenance
You need ot inspect and care for your awning setup regularly to prevent unforeseen issues over time.
Failing To Secure It While Driving
You should make sure that your awning is closed up and fastened to the vehicle when on the road. Otherwise, the wind resistance can tug on it, causing strain and potential damage.
Maintaining Tips For Your Awning Setup
Ensure that your awning is in the best condition with the following tips:
-
Clean it regularly, removing dirt and debris from both the fabric and frame using mild soap and water. Avoid harsh chemicals that can damage fabrics.
-
Lubricate the awning’s moving parts, such as hinges and joints, to keep its operation smooth.
-
When not using your awning, restart it fully and secure it with the provided straps, and use covers to protect it from the elements.
-
Inspect your awning for wear and tear, like frayed fabric or rusted components, so you can be sure to address them before they become an issue.
-
Dry your awning before storing it to avoid mold and mildew.
Share Your Adventure Awning Stories
Equipping your car with an awning can make those outdoor adventures all the easier to enjoy. At Bossco Auto, we welcome you to send your stories in the comments. More people need to know just how vital a good awning can be for opening more opportunities for exploration, travel, and camping.